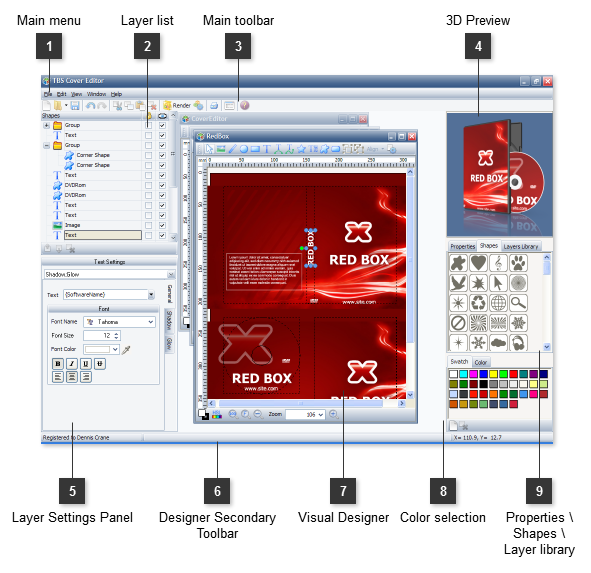
The visual designer is a core element of the TBS Cover Editor main window. You can quickly create an original box shot design by adding new layers and by applying visual effects to them.
You have not to have deep knowledge in visual effects to create a professional looking box shot or covers. All tools and effects are easy to understand and to use.
Then you can easily setup the 3D look of your box shot, CD or cover in preview area and render a picture literally in two clicks.
Main menu
The application menu provides access to common commands and operations.
The 3D preview area instantly shows how your 3D box shot or cover looks like. You can quickly adjust object's position, zoom factor and angles with the mouse.
To set those and more 3D parameters explicitly double click on the preview area or right click on it and select Setting in the pop up menu. This will open 3D Preview Settingsdialog.
The panel consists of several sections that allow applying various visual effectsto a selected layer. Initially all layers have no effects. Once you have applied an effect to a layer the corresponding effect tab is colored with green.
The General section shows the settings which are specific to the layer's type. Other sections, with visual effects are the same for all layer types.
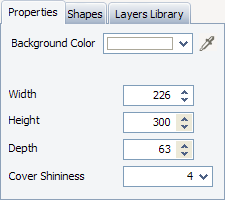
Use this section to specify the background color of the color and basic dimensions of the 3D model.
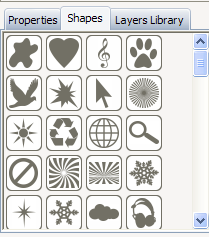
Vector shapes
With the list of vector shapes you may easily add a new shape layer to your design. Simply drag the shape from the list and drop it into the Visual Designer area to create a new layer.
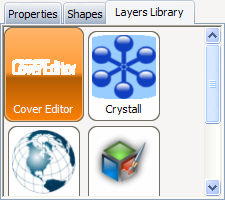
Layer library
With the Layer Library you can save a layer or a group of layers to the repository and quickly access to these layers any time later.


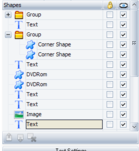 The list displays all
  The 3D preview area instantly shows how your 3D box shot or cover looks like. You can quickly adjust object's position, zoom factor and angles with the mouse.
 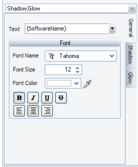 The
The 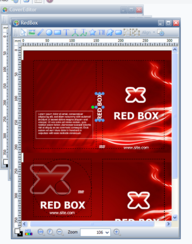 The designer area is a core part of TBS Cover Editor main window. It allows adding and moving layers in WYSIWYG manner.
 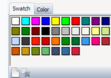 The color selection area helps select a new active color with a single click. Use Swatches palette to keep the most used colors.