Use this dialog to finally render the 3D box shot scene and to save it into an image file. In the Rendering window you may explicitly specify the size of the output image, cropping settings and interpolation filter type.
Preset dimensions
Press the button to select a preset dimension (height and width) of the output image from the pull down list.
Check the option to automatically cut off the blank spaces of the output image to reduce the image file size. Nevertheless, this function keeps about 3% of the blank space around the image.
Use resampling filters to enhance the appearance of the output image. Some filters add blurring or smoothing effect to an image, while others increase the sharpness of the edges. Test every filter to choose one that suits your design style.
The following filter types are available:
Bilinear
Produces good results for image reduction and enlargement, but displays sharp transition lines. Very fast calculations.
Lanczos
Produces the sharpest images, but may also introduce some ringing artefacts.
Bicubic
Produces good results with photo-realistic images and with images that are irregular or complex.
Gaussian
Produces smooth transitions, but may cause excessive blurring.
Use this field to set the image pixel softness. It defines the scaling of the area covered by each single pixel. Higher values produce softer (more blurry) image. The values lower than 1.0 produce sharper output, though the aliasing and fuzziness effect may appear as well.


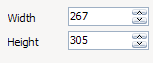 Use these numeric fields to explicitly set the output image width and height in pixels.
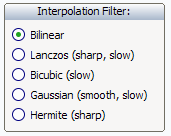 Use resampling filters to enhance the appearance of the output image. Some filters add blurring or smoothing effect to an image, while others increase the sharpness of the edges. Test every filter to choose one that suits your design style.
 Press the button to render the 3D box shot image with set parameters.
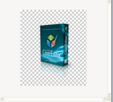 The preview area displays the rendered 3D box shot image.